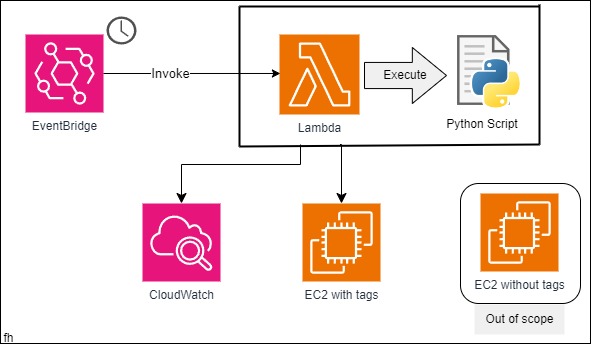
Scheduling the start and stop times of AWS EC2 instances is a cost-effective strategy for optimizing cloud spending. By proactively managing instance uptime, businesses can align computing resources with actual usage patterns. This approach minimizes unnecessary runtime hours, leading to significant cost savings. It's particularly beneficial for non-production environments, development, and testing setups, where instances don't need to run 24/7.
Manually accomplishing this Start/Stop would be a very inefficient way. In here we will leverage Amazon EventBridge to invoke the Lambda function to Stop or Start the specific instance, segregated by instance “Tag”.
Prerequisite:
-User with permission to perform IAM, EC2, Lambda, EventBridge and CloudWatch activities.
-A running EC2. You can create one by following this "CREATING AN EC2 INSTANCE".
Step 1: EC2 tag
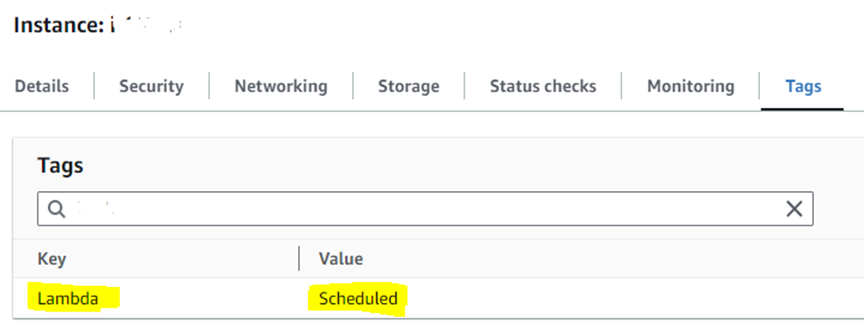
Login AWS account and navigate to EC2 dashboard. Select the specific EC2 instance and create the proper tag to identify and invoke Lambda function. You can create or use any existing tag that serves your purpose.
In here we created a tag Key: Lambda with Value: Scheduled for our convenience.
Step 2: Create IAM Policy and Role
Now we need IAM policy with the required permission and Role attached to the created IAM policy.
Navigate to IAM dashboard and select the Policies menu. Click on Create policy from top right corner and click on JSON.
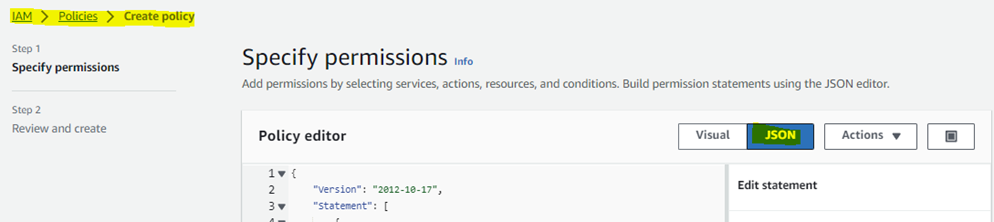
Paste the below code on the Policy editor and click on Next. GitHub link.
{
    "Version": "2012-10-17",
    "Statement": [
        {
            "Sid": "VisualEditor0",
            "Effect": "Allow",
            "Action": [
                "ec2:DescribeInstances",
                "ec2:StartInstances",
                "ec2:DescribeTags",
                "ec2:DescribeInstanceTypes",
                "ec2:StopInstances",
                "ec2:DescribeInstanceStatus",
                "logs:CreateLogStream",
                "logs:PutLogEvents",
                "logs:CreateLogGroup"
            ],
            "Resource": "*"
        }
    ]
}
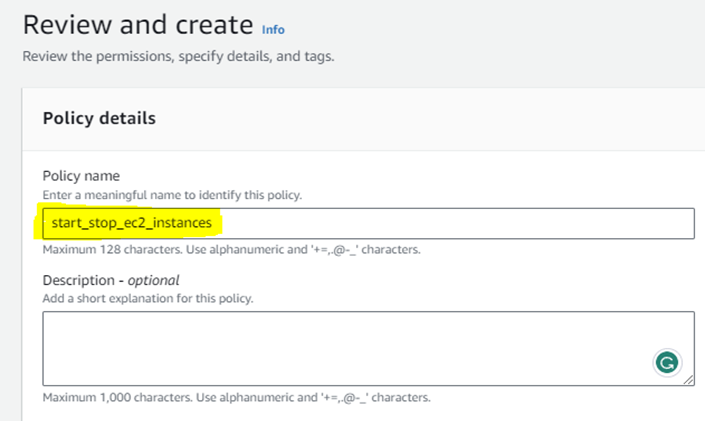
Name the policy, review it, and create the policy.
Now navigate to Roles menu and click on Create role.
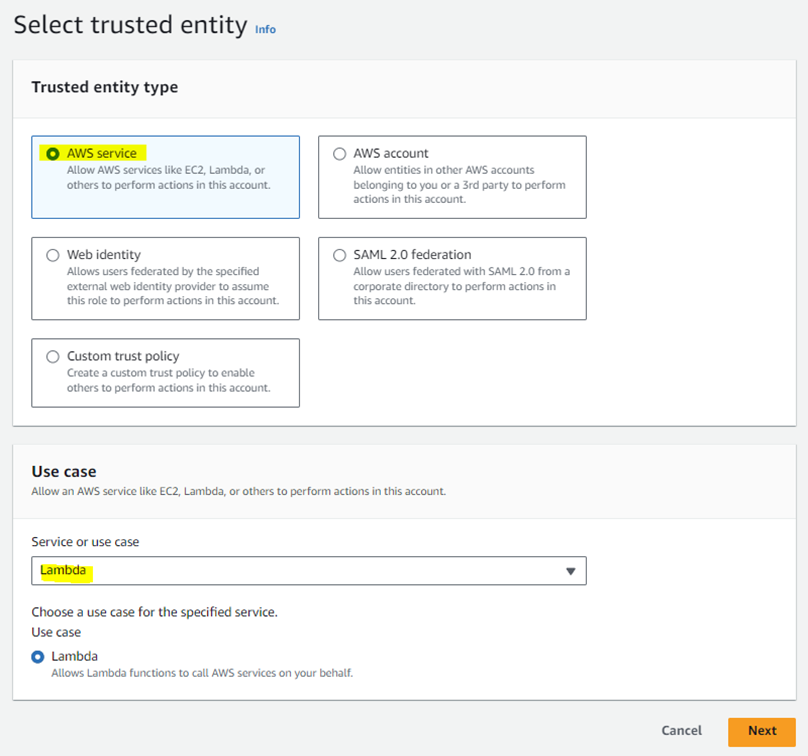
Select AWS service. select Lambda from the “Use case” drop-down menu and move to next.
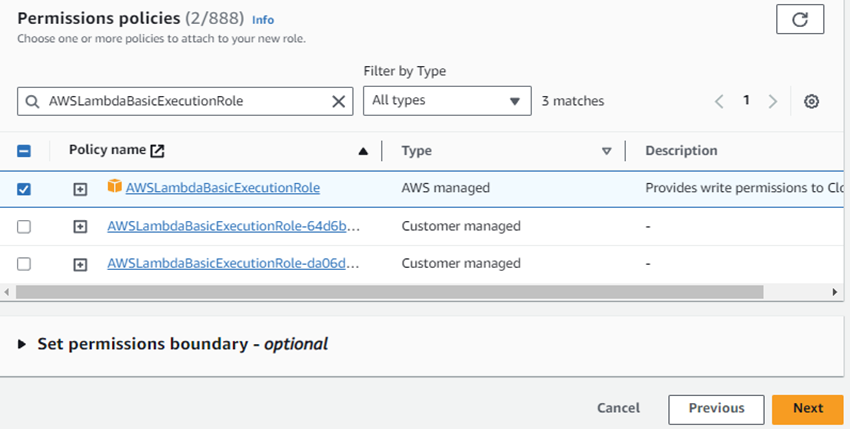
Now select your created IAM policy and AWSLambdaBasicExecutionRole. Then review and Create role.
Step 3: Create Lambda function with Python code
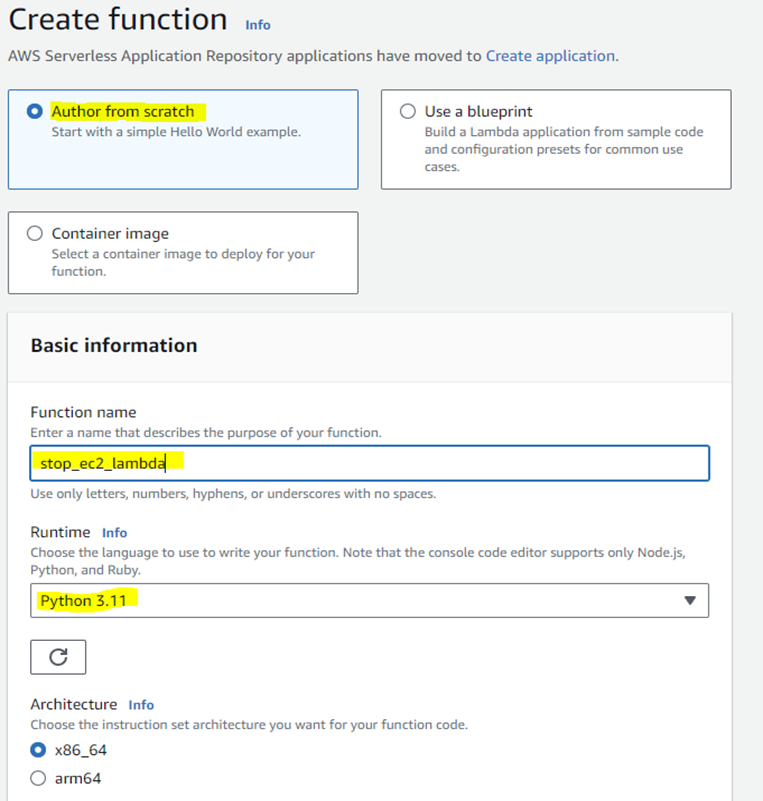
Now we’ll create the Lambda function with Python script. Navigate to Lambda dashboard from AWS management console and click on Create function. We’ll create 02 separate functions for start and stop instances.
First Stop instance script. Select option “Author from scratch” and name the function, here we named “stop_ec2_lambda”, and select Runtime as Python 3.
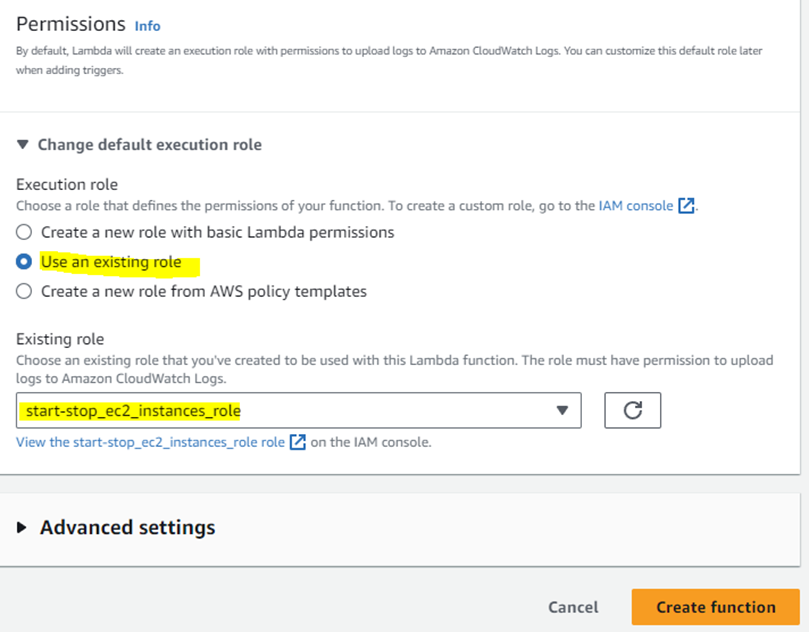
Now we need to set the permissions. Select “Use an existing role” from the Change default execution role dropdown menu. Then from the Existing role option, select the role we created earlier (start-stop_ec2_instances_role) from the dropdown menu and create a function.
Now paste the below code in the Code section. GitHub link.
import json
import boto3
region = 'ap-southeast-1'  ##set your ec2 region
ec2 = boto3.resource('ec2', region_name=region)

def lambda_handler(event, context):
    instances = ec2.instances.filter(Filters=[{'Name': 'instance-state-name', 'Values': ['running']},{'Name': 'tag:Lambda','Values':['Scheduled']}])
    for instance in instances:
        id=instance.id
        ec2.instances.filter(InstanceIds=[id]).stop()
        print("Instance ID is stopped: "+instance.id)
    return "success"
**Make sure you change the region to your desired one. Also the tag name and value as you set earlier.
Repeat the same step for Start instance. Just change the function name to “start_ec2_lambda” and paste the below code in the Code section. GitHub link.
import json
import boto3
region = 'ap-southeast-1'   ##set your ec2 region
ec2 = boto3.resource('ec2', region_name=region)

def lambda_handler(event, context):
    instances = ec2.instances.filter(Filters=[{'Name': 'instance-state-name', 'Values': ['stopped']},{'Name': 'tag:Lambda','Values':['Scheduled']}])
    for instance in instances:
        id=instance.id
        ec2.instances.filter(InstanceIds=[id]).start()
        print("Instance ID is started : "+instance.id)
    return "success"
**Make sure you change the region to your desired one. Also the tag name and value as you set earlier.
Step 4: Create a schedule with Amazon EventBridge
Now move to the Amazon EventBridge dashboard and create EventBridge rule. We’ll create 02 separate rules for Start and Stop instance.
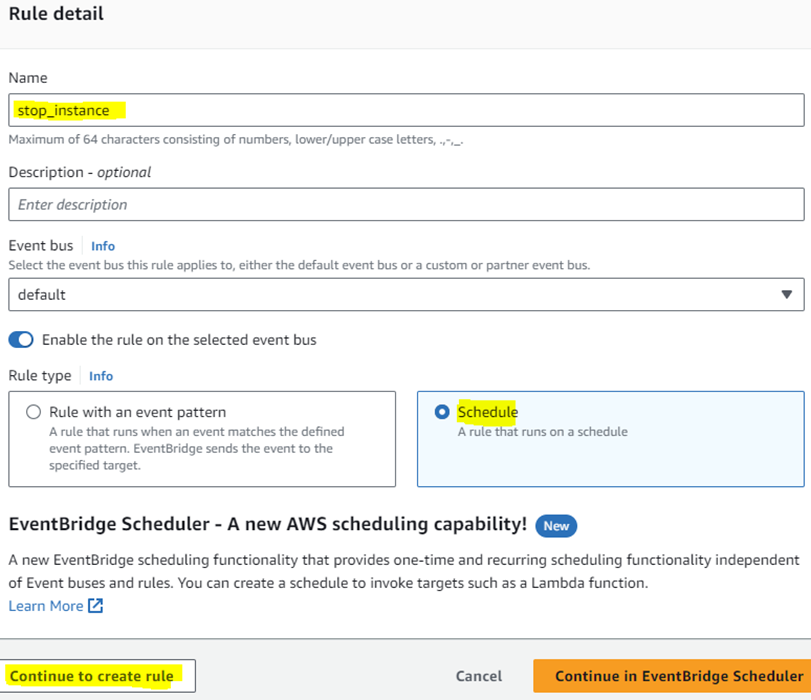
First, create a schedule to stop instances. Name the Schedule, we name “stop_instance” and select “Schedule” from Rule type and Continue to create rule.
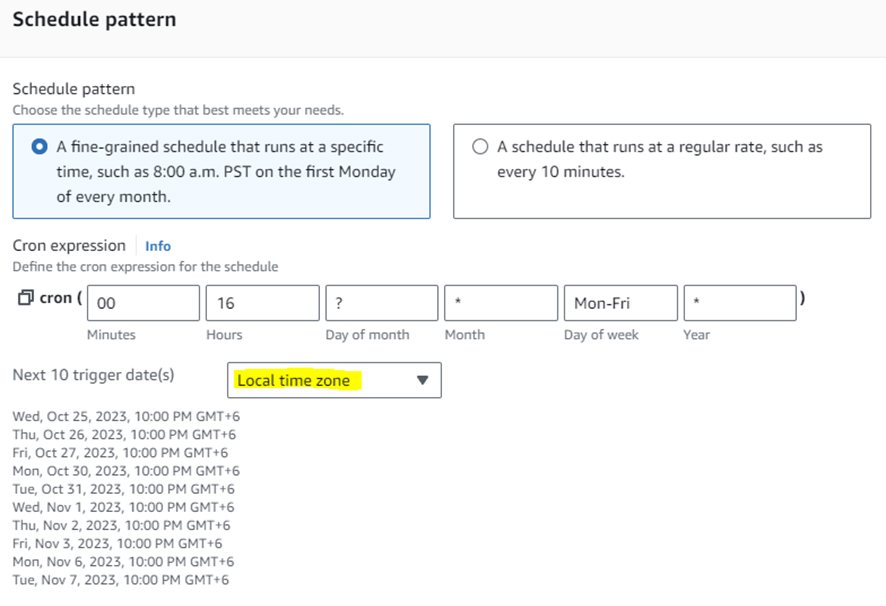
Now schedule the event. There are a couple of other schedule patterns, but we use cron for our job. Here we schedule the event to trigger at 10PM, Monday to Friday throughout the year. The Cron expression time is in UTC, you can select your Local time zone from the dropdown menu for your convenience. For more details on Cron-based schedules follow this link. Once done with the schedule, click next.
Note: Linux cron expression and AWS cron expression work differently.
Now, choose the AWS service from the “Target types” option and select the Lambda function from the “Select target” dropdown menu. In the Function dropdown menu, select “stop-ec2-lambda” since we’re scheduling the EC2 stop task. Click on next. Now review and click on “Create rule”.
Repeat the same process to create a new rule for starting the EC2. Remember to change the function to “start-ec2-lambda” in Step 3 (Target section).
Now check whether your instance is Stopping and Starting at your scheduled time or not. However, you can check the logs from CloudWatch. Select “Log groups” from the CloudWatch dashboard and you’ll find your lambda logs grouped there.
You can get the full process with all codes from this GitHub repo as well.
————————-END————————-


Add Comment