
Amazon Web Services (AWS) provides a vast array of cloud computing services, and one of the fundamental services to start with is Amazon Elastic Compute Cloud (EC2). EC2 allows you to launch virtual machines (instances) in the AWS cloud, making it a foundational resource for hosting applications, websites, and more. In this guide, we’ll walk you through the process of creating your first EC2 instance.
Prerequisites
Before you begin, ensure that you have the following:

1. An AWS account: If you don't have one, you can sign up at AWS Signup.
2. An AWS Identity and Access Management (IAM) user: It's a best practice to create an IAM user for yourself with appropriate permissions. This user should not use your AWS root account credentials.
3. Familiarity with basic AWS concepts: Some understanding of VPCs (Virtual Private Clouds), security groups, and key pairs will be helpful.
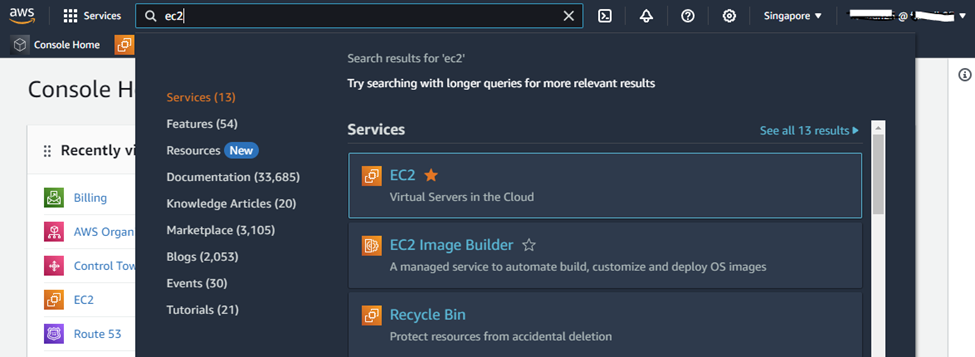
Step 1: Sign into the AWS Console
Log in to your AWS account. Once you’re in, navigate to the AWS Management Console. In the AWS Management Console, you’ll find the EC2 service under the “Compute” section. Click on “EC2” to access the EC2 Dashboard.
***Make sure you are in your desired AWS region (in my case, it’s Singapore), else change the region.
Step 2: Launch an Instance
Now, let’s launch your first EC2 instance:
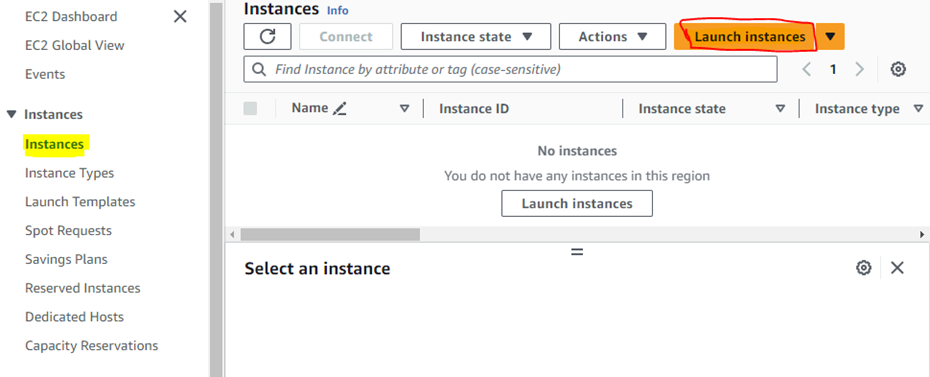
- Click “Instances” in the Navigation Pane: On the EC2 Dashboard, you’ll see options for Instances, Images, and other related resources. Click on “Instances.”
- Click the “Launch Instance” button to start the instance creation process.
- Name your instance: Put a name for your instance in the name box.
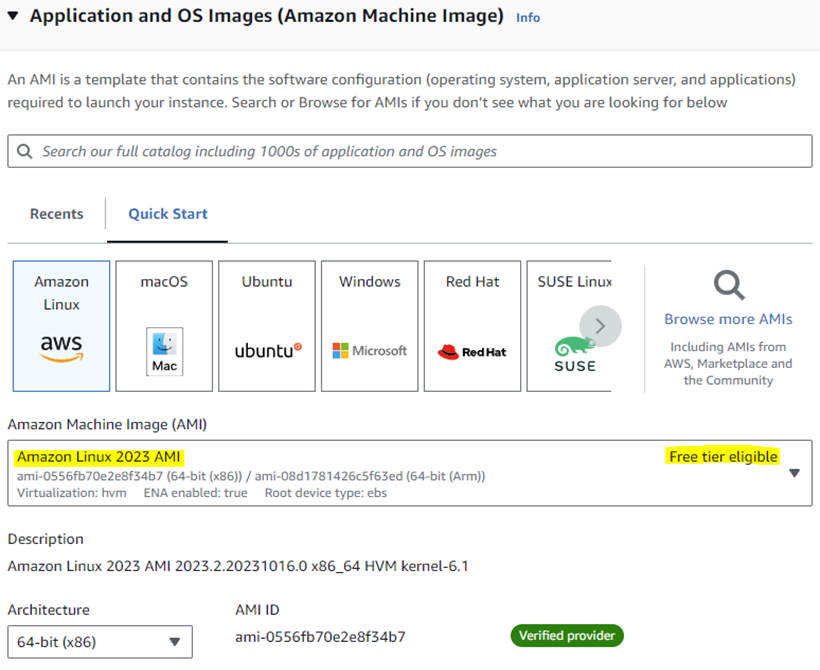
- Choose Amazon Machine Image (AMI): You’ll be presented with a list of available AMIs, which are pre-configured templates for your virtual machine. You can choose from a variety of operating systems and software configurations. Select the one that suits your needs. For a basic Linux instance, you can choose “Amazon Linux 2023” or “Ubuntu Server” with “Free tier eligible”.
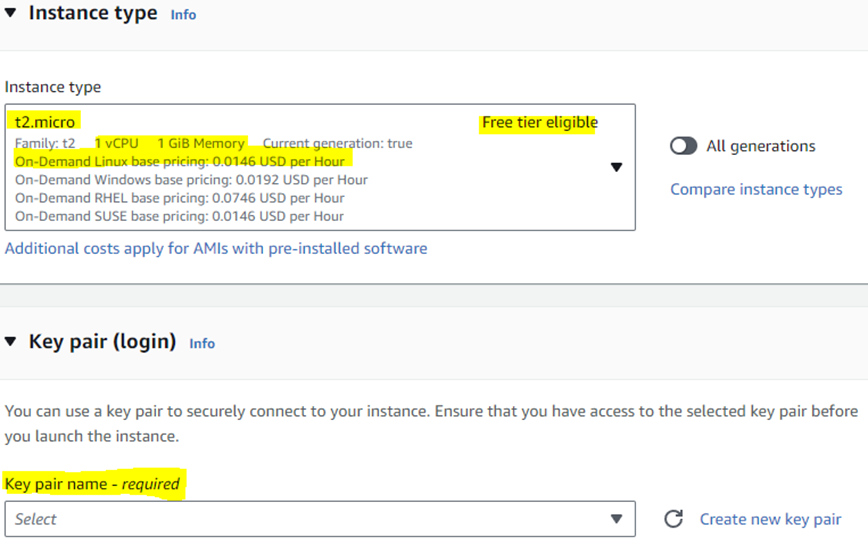
- Choose an Instance Type: AWS offers various instance types optimized for different workloads. The default selection is usually a good starting point. You can explore other options depending on your requirements, but for your first instance, the default should suffice.
- Key pair: A key pair consists of a public key that AWS stores and a private key file that you download to your computer. You’ll use this key pair to connect to your instance securely.
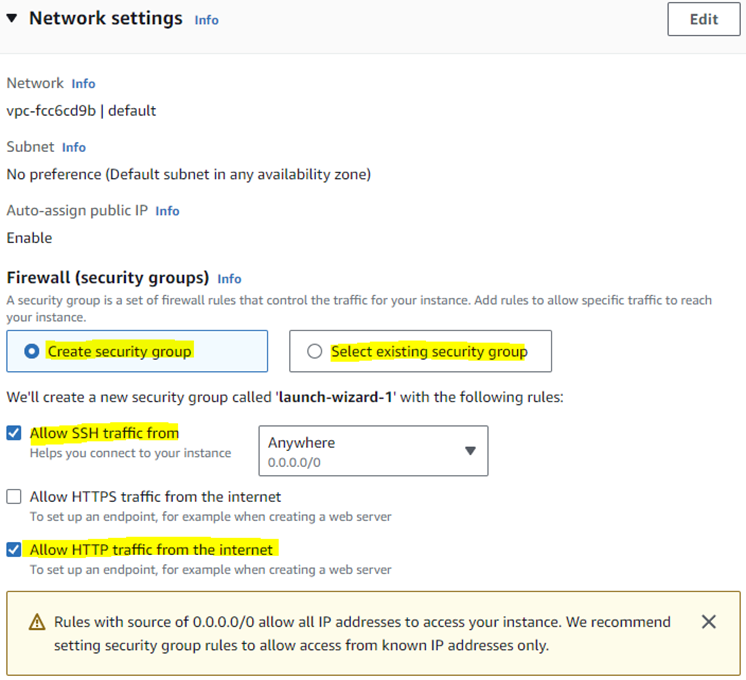
- Network Settings: A security group acts as a virtual firewall for your instance, controlling inbound and outbound traffic. You can either select an existing security group or create a new one. Here we are allowing SSH and HTTP traffic.
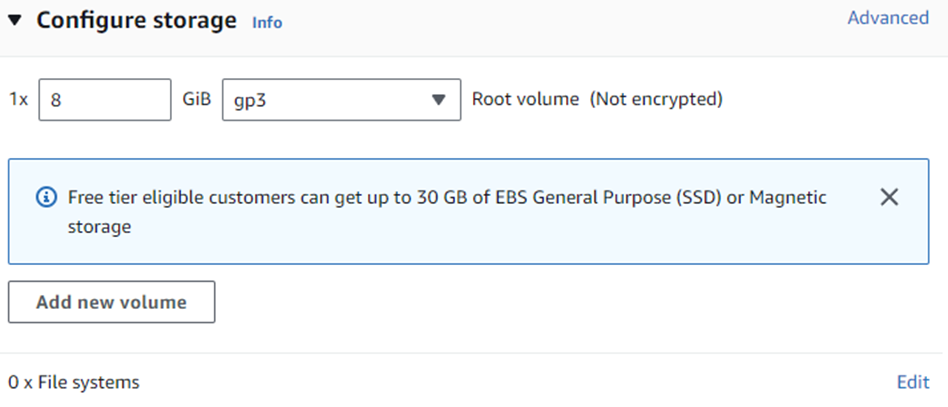
- Storage settings: Configure the storage size and type for your instance. The default settings are often suitable for many use cases.
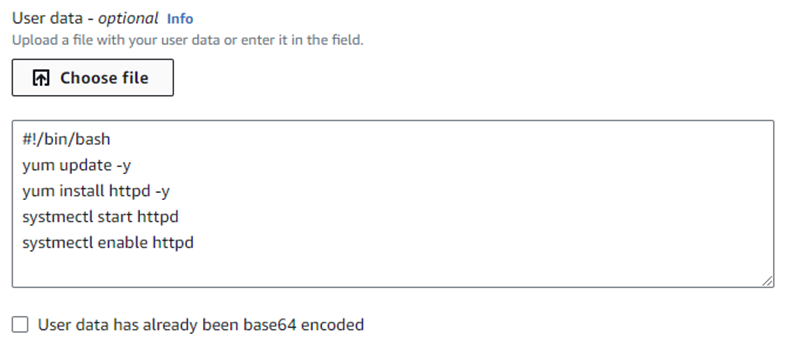
- User Data: When initiating an instance on Amazon EC2, you have the choice to provide user data to the instance. This user data can facilitate automated configuration tasks and execute scripts once the instance is up and running. Amazon EC2 accepts two types of user data: shell scripts and cloud-init directives. You can input this data in multiple ways, including as plain text within the launch instance wizard, as a file (particularly useful for command line tool launches), or as base64-encoded text for API calls. Here we use shell script command in plain text to launch a webserver on bootup.
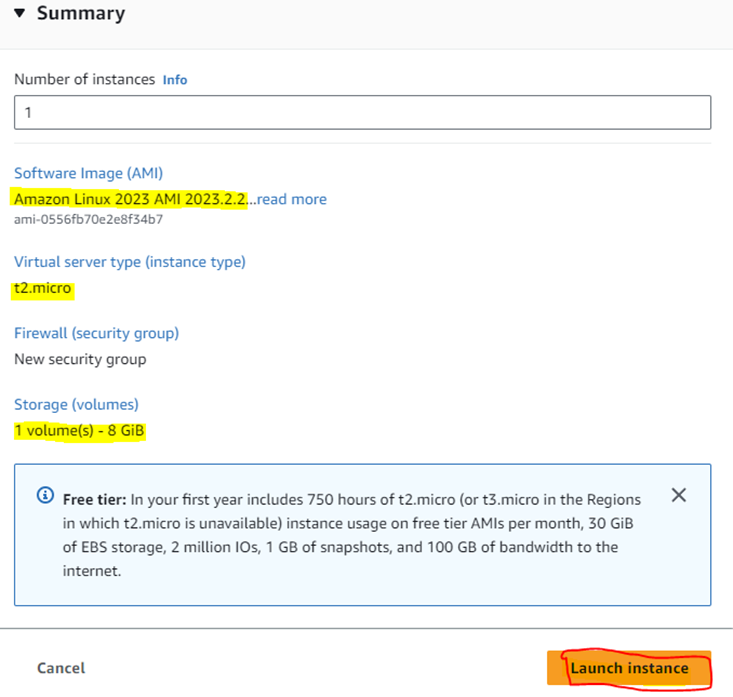
- Review and Launch: Review your instance’s configuration. Ensure everything is set as you want it. If you’re satisfied, click “Launch.”
Step 3: Access Your EC2 Instance
Your EC2 instance is now launching. Once it’s running, you can access it through SSH (for Linux instances) or Remote Desktop (for Windows instances) using the key pair you created. Here are some common tasks to perform on your EC2 instance:
- Connecting to Your Instance: Use the private key file you downloaded earlier to connect to your instance via SSH (for Linux) or Remote Desktop (for Windows).
- Installing Software: You can install and configure software on your EC2 instance to host websites, applications, or services.
- Managing Security Groups: Modify your security group settings to control inbound and outbound traffic.
- Creating Snapshots: Regularly create snapshots of your instance to back up your data and settings.
- Terminating Instances: When you no longer need an instance, remember to terminate it to stop incurring charges.
With this guide, you’ve successfully created your first EC2 instance in AWS. Now you’re ready to explore the vast capabilities and services AWS offers, from hosting websites to running machine learning models, all on a scalable and reliable cloud infrastructure. Happy cloud computing!
——————END——————


Add Comment